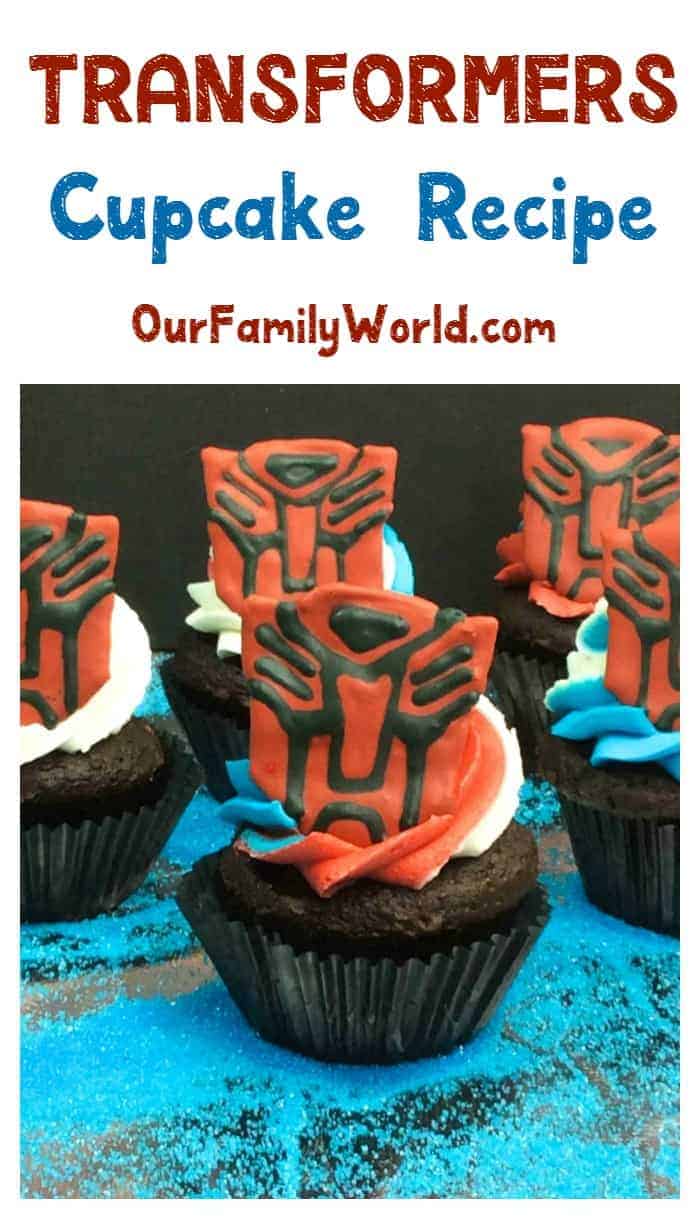
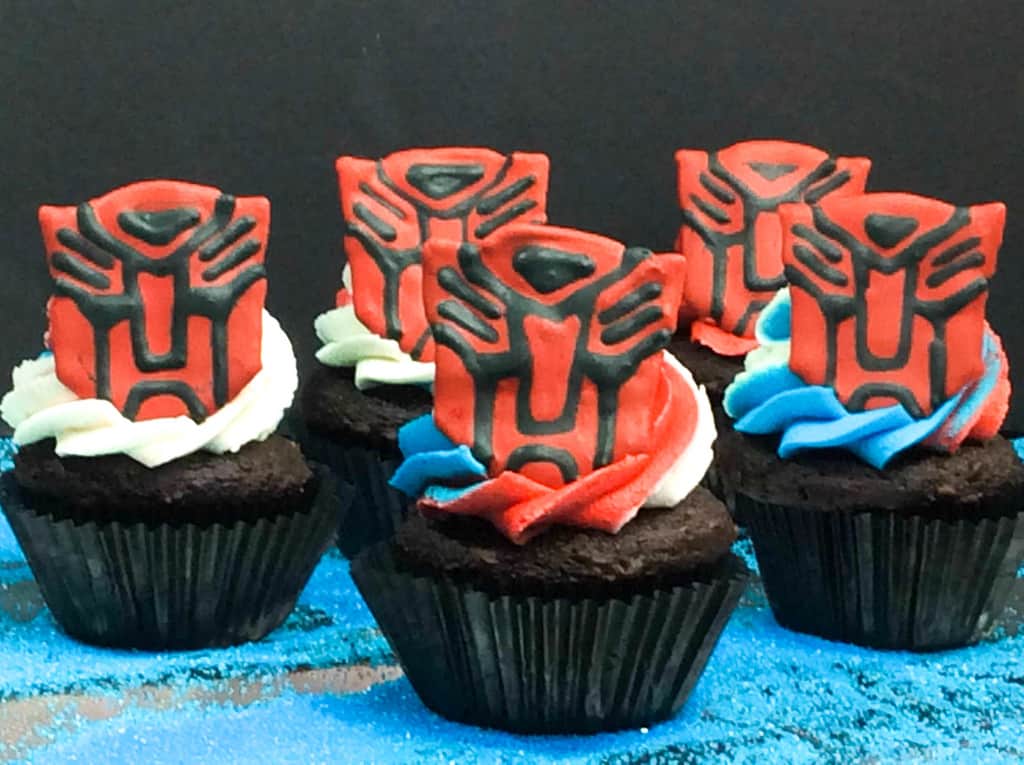
Planning a special party for your favorite little Autobot this summer? You need this insanely cute and fun Transformers cupcake recipe! It’s so much more than meets the eye. Sorry, I couldn’t resist. I’m not going to lie, it does take a bit more work than our typical cupcake recipes, but I think you’ll be pleasantly surprised at how easy it is over all when you follow our directions.
One thing I LOVE about these cupcakes: they double as decor. I’m all about party food that also works as decorations. Two birds, one bush and all (I never liked the whole stone analogy, let’s not throw things at the birds!). Read on for how to make these cupcakes, then print out the recipe card for later!

Transformers Cupcake Recipe
Affiliate links included below. Thanks for your support!
You’ll want to make the Autobot icing transfer first because it needs to set. It’s best to make it the night before you do the cupcakes, but even a few hours prior will do.
Ingredients for the Autobot icing transfer
- 2 egg whites
- 1 1/2 C powder sugar
- 1/4 tsp cream of tarter
- 1/2 tsp vanilla
- two piping bags
fitted with the number 2 tip
- red and black food dye
- Autobot image from google
- pen or pencil to trace the image
- piece of white paper
- Cookie sheet
- parchment paper
- 2 bowls


Directions to make transfer
- Locate the Autobot template image on Google and print it out
- Take your piece of paper and place on top of the image

- Using a pen or pencil trace the image onto the white paper about 3-4 times 4 inches apart
- Place the paper with the copies onto the cookie sheet
- Fit a sheet of parchment paper onto the cookie sheet and tape the edges so that you have a smooth flat area
- Using the standing mixer
, combine the powder sugar, egg whites, cream of tarter and vanilla and mix on medium speed
- if the royal icing is still a yellow soup, add in 1/2 C powder sugar
- Continue to mix for another 5 minutes until stiff peaks form
- Split the icing into two bowls
- Add the red food dye into 1 bowl and the black food dye into the other bowl
- Scoop the red icing into one piping bag and the black icing into the other piping bag
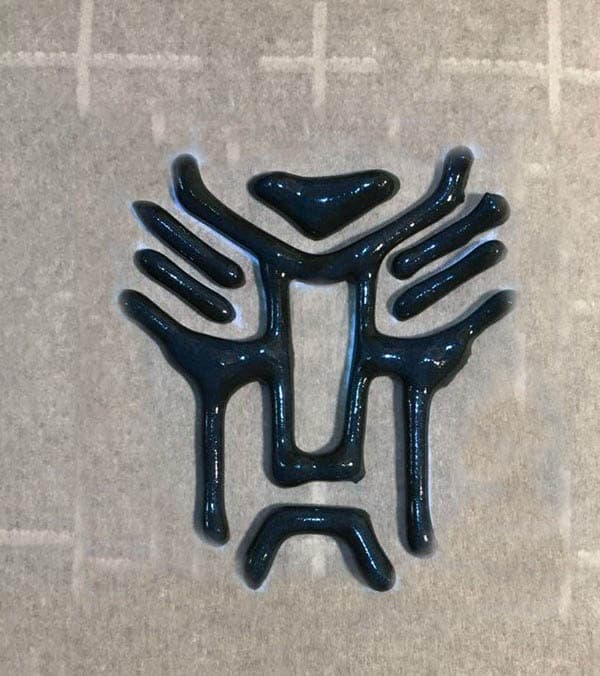
- Using the black icing, pipe out the lines on the Transformer’s face
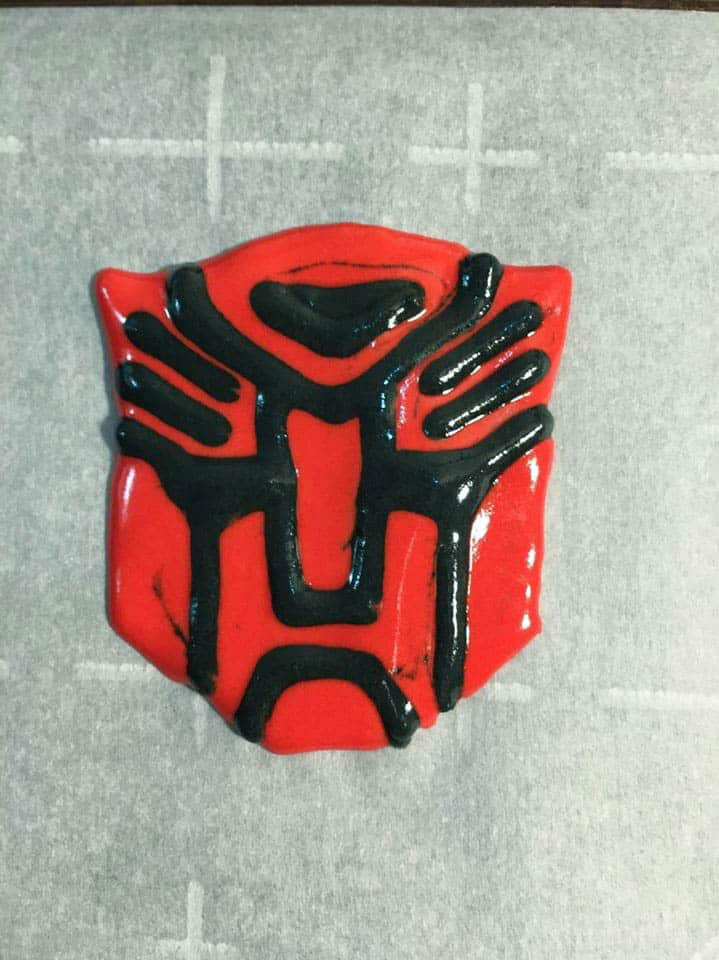
- Using the red icing, fill in the Transformer’s face as shown in the image
- Let sit to dry for a day before taking off the cookie sheet.
Makes 24 cupcakes
Ingredients for cupcakes
- 1 box of chocolate cake mix
- 3 eggs
- 1/2 C oil
- 1 C water (measurements for the eggs, oil and water will change based on which brand of cake mix you purchase)
- cupcake liners
- cupcake pan

Directions for cupcakes
- Preheat oven to 350 and line cupcake pan with the liners
- In a medium bowl, combine the mix, eggs, oil, and water and mix until combined
- Using a medium ice cream scoop
, scoop the batter into the cupcake liners and fill about 3/4 of the way full
- Bake in the oven for about 21 minutes
- Pull out and place on the side to cool
Frosting Ingredients
- 1 C unsalted sweet cream butter, softened
- 2 1/2 C powder sugar
- 1 tsp vanilla
- 3-5 TBSP heavy whipping cream
- Blue and red food coloring
- 3 bowl
- medium star tip and pastry bag
- Large cup to put the piping bag in

Directions
- Using a standing mixer, combine all ingredients except the food coloring into the bowl and mix on medium speed
- If your frosting starts looking like powdery rocks, add another tablespoon of heavy whipping cream
- Mix until you see creamy stiffed peaks
- Separate the frosting into three bowls
- Add the red food dye into one bowl
- Add the blue food dye into the second bowl
- Leave the third bowl white
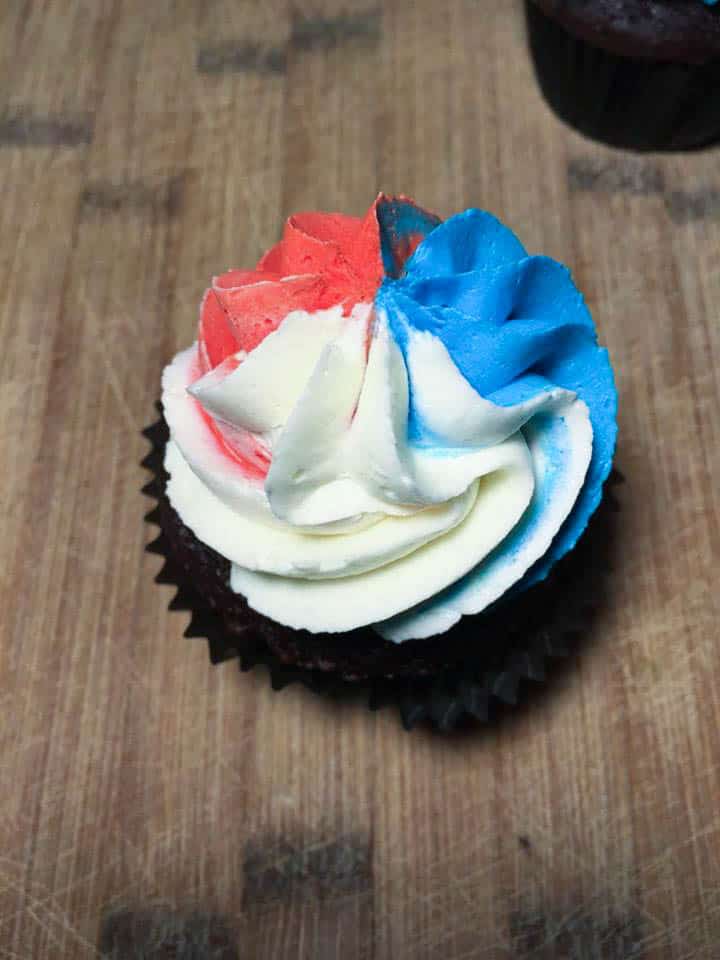
- Fit the star tip into the piping bag and place the bag inside the cup, pulling the bag over the cups edge
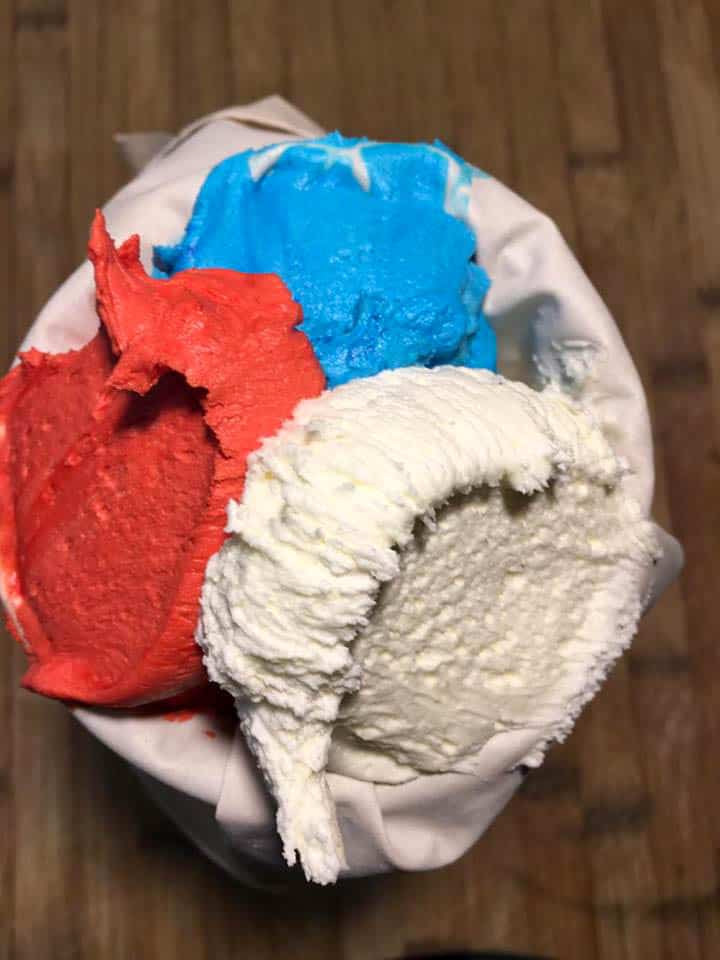
- Using a spoon, scoop some of the red icing and put it on 1/3 part of the piping bag
- Repeat with the blue and white frosting
- Twist the top of the piping bag and squeeze the frosting down
- Take your cooled cupcake and frosting the cupcake from the outer edge
- Place the transfer onto the frosting
Print this recipe for later:
The Ultimate Transformers Cupcake Recipe for Your Favorite Autobot!

- AUTOBOT ICING TRANSFER
- 2 egg whites
- 1 1/2 C powder sugar
- 1/4 tsp cream of tarter
- 1/2 tsp vanilla
- two piping bags fitted with the number 2 tip
- red and black food dye
- Autobot image from google
- pen or pencil to trace the image
- piece of white paper
- Cookie sheet
- parchment paper
- 2 bowls
- CUPCAKES
- 1 box of chocolate cake mix
- 3 eggs
- 1/2 C oil
- 1 C water
- measurements for the eggs, oil and water will change based on which brand of cake mix you purchase
- cupcake liners
- cupcake pan
- FROSTING
- 1 C unsalted sweet cream butter (softened)
- 2 1/2 C powder sugar
- 1 tsp vanilla
- 3-5 TBSP heavy whipping cream
- Blue and red food coloring
- 3 bowl
- medium star tip and pastry bag
- Large cup to put the piping bag in
- AUTOBOT ICING TRANSFER
- Locate the Autobot template image on google and print it out
- Take your piece of paper and place on top of the image
- Using a pen or pencil trace the image onto the white paper about 3-4 times 4 inches apart
- Place the paper with the copies onto the cookie sheet
- Fit a sheet of parchment paper onto the cookie sheet and tape the edges so that you have a smooth flat area
- Using the standing mixer, combine the powder sugar, egg whites, cream of tarter and vanilla and mix on medium speed
- if the royal icing is still a yellow soup, add in 1/2 C powder sugar
- Continue to mix for another 5 minutes until stiff peaks form
- Split the icing into two bowls
- Add the red food dye into 1 bowl and the black food dye into the other bowl
- Scoop the red icing into one piping bag and the black icing into the other piping bag
- Using the black icing, pipe out the lines on the transformers face
- Using the red icing, fill in the transformer face as shown in the image
- Let sit to dry for a day before taking off the cookie sheet.
- CUPCAKE RECIPE
- Preheat oven to 350 and line cupcake pan with the liners
- In a medium bowl, combine the cake mix, eggs, oil, and water and mix until combined
- Using a medium ice cream scoop, scoop the batter into the cupcake liners and fill about 3/4 of the way full
- Bake in the oven for about 21 minutes
- Pull out and place on the side to cool
- FROSTING
- Using a standing mixer, combine all ingredients except the food coloring into the bowl and mix on medium speed
- If your frosting starts looking like powdery rocks, add another tablespoon of heavy whipping cream
- Mix until you see creamy stiffed peaks
- Separate the frosting into three bowls
- Add the red food dye into one bowl
- Add the blue food dye into the second bowl
- Leave the third bowl white
- Fit the star tip into the piping bag and place the bag inside the cup, pulling the bag over the cups edge
- Using a spoon, scoop some of the red icing and put it on 1/3 part of the piping bag
- Repeat with the blue and white frosting
- Twist the top of the piping bag and squeeze the frosting down
- Take your cooled cupcake and frosting the cupcake from the outer edge
- Place the transfer onto the frosting
There you have it! The ultimate Transformers cupcake recipe for your favorite little Autobot! Hurry up and eat them before the Decepticons crash the party!
Looking for more amazing party themes for all your summer birthdays? Don’t miss our Pirates of the Caribbean theme, complete with TWO taste recipes!
What birthday party themes are your kids asking for this summer? Share in the comments!


Those are just adorable for a little boy! :)
Love these
My boys are big Transformer fans so they would love these awesome cupcakes!
These are so cute and look delicious, I Love the colors.